AWS IoT provides secure, bi-directional communication between Internet-connected devices such as sensors, actuators, embedded micro-controllers, or smart appliances and the AWS Cloud. This enables you to collect telemetry data from multiple devices, and store and analyze the data. You can also create applications that enable your users to control these devices from their phones or tablets.
AWS IoT groups up following services:-
For more details about AWS IoT please visit here.
NodeSense provides various type of wireless sensors for industrial monitoring. NodeSense gateway collects data from these sensors and sends that data to the cloud.
In the post, we will use NodeSense gateway to send sensors data to the AWS IoT cloud. For this tutorial, you will need
Let's assume you already have an AWS IoT account (if don't have then create an account on AWS), to proceed with the tutorial, first of all, we will create a device (or thing) with AWS IoT Cloud and will set up some access control and device policy so that our gateway can communicate with AWS IoT cloud. So grab your tools and let's get started.
Sign in to AWS Console and go to AWS IoT. Here we will create a new device.
On the Welcome to the AWS IoT Console page, in the left navigation pane, choose Manage to expand the choices, and then choose Things.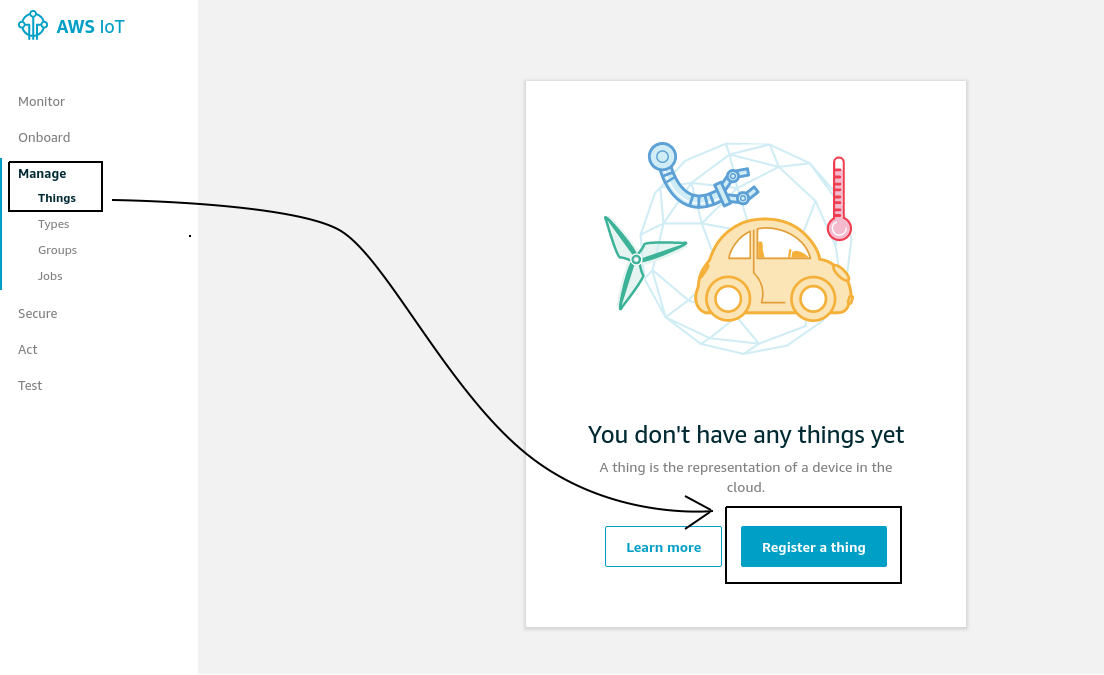
On the page that says You don't have any things yet, choose Register a thing.
On the Creating AWS IoT things page, choose Create a single thing.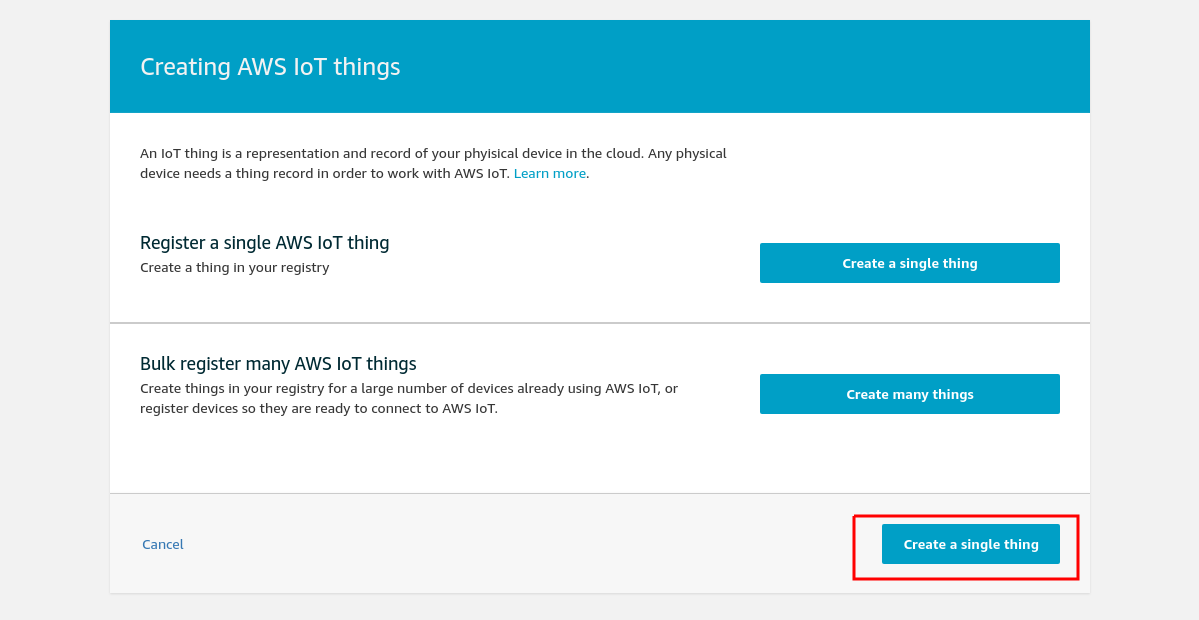
On the Create a thing page, in the Name field, type a name for your device, such as MySensor. Choose Next to add your device to the registry.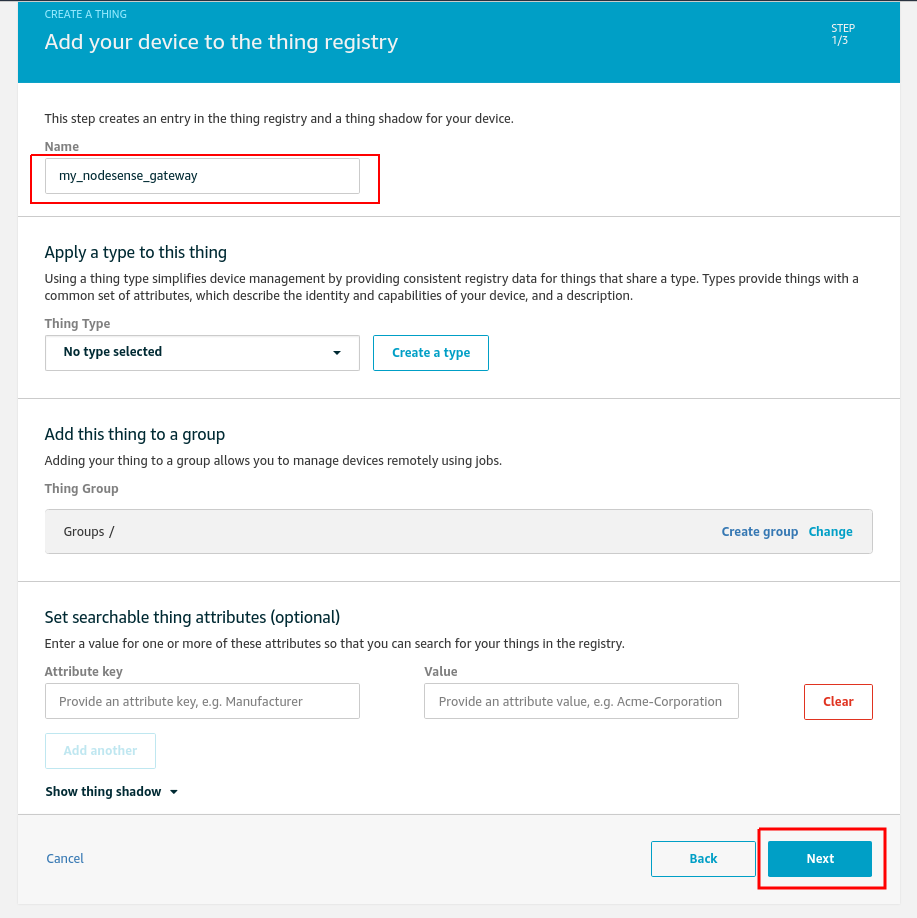
Now on next step to Add a certificate for your thing, choose to Create certificate.
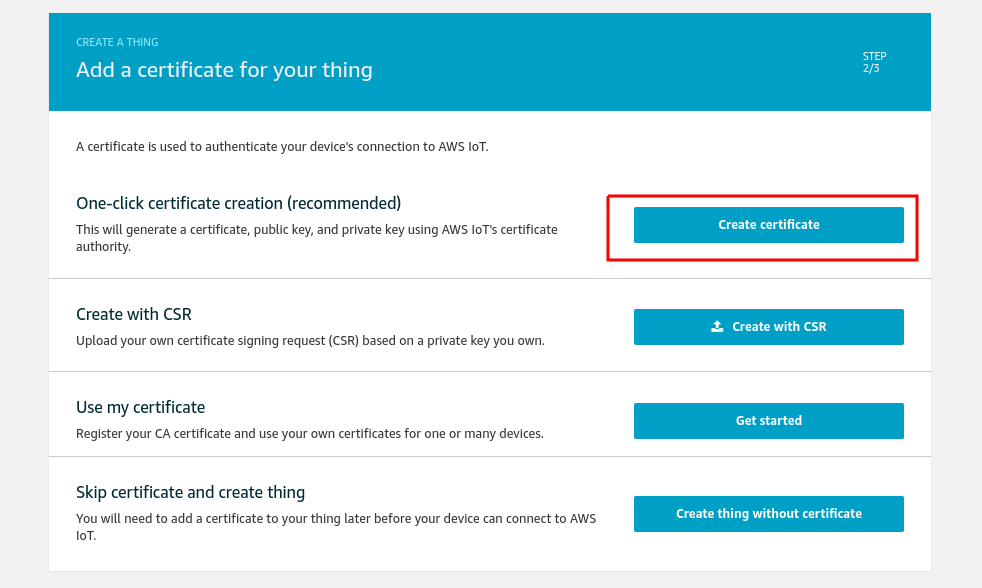
This will generate a certificate, public key, and private key using AWS IoT's certificate authority. After this, your certificate will be created and now you can download the certificates and the keys from this page.
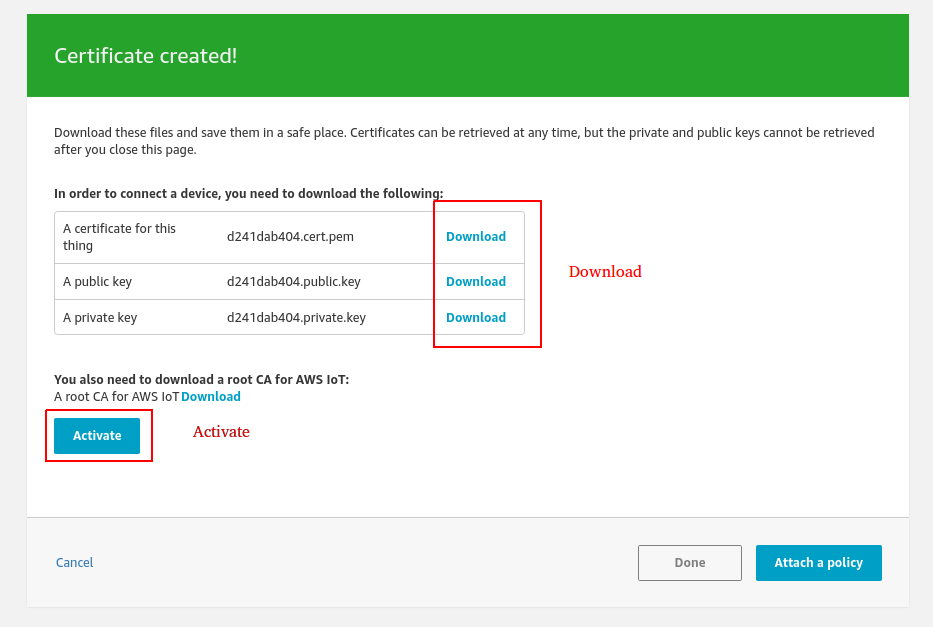
Download the certificate and the keys. These will be required in order to connect Nodesense Gateway to AWS IoT. Now click on 'Activate' to activate the certificate. Now click on done and your thing is created.
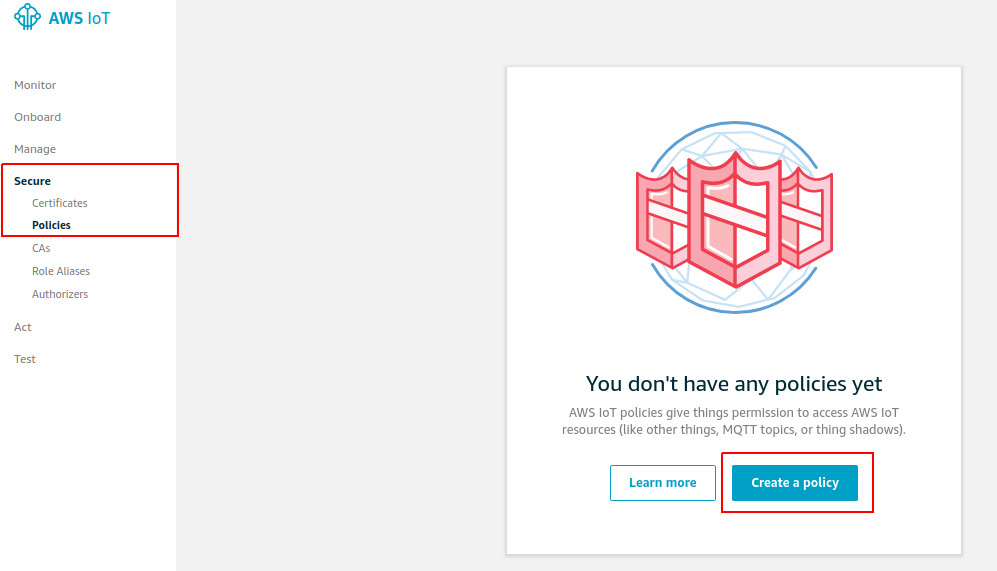
Now we have to create a policy for the device and attach it to the certificate. On the left side menu go to 'Secure' > 'Policies' > 'Create a policy'.
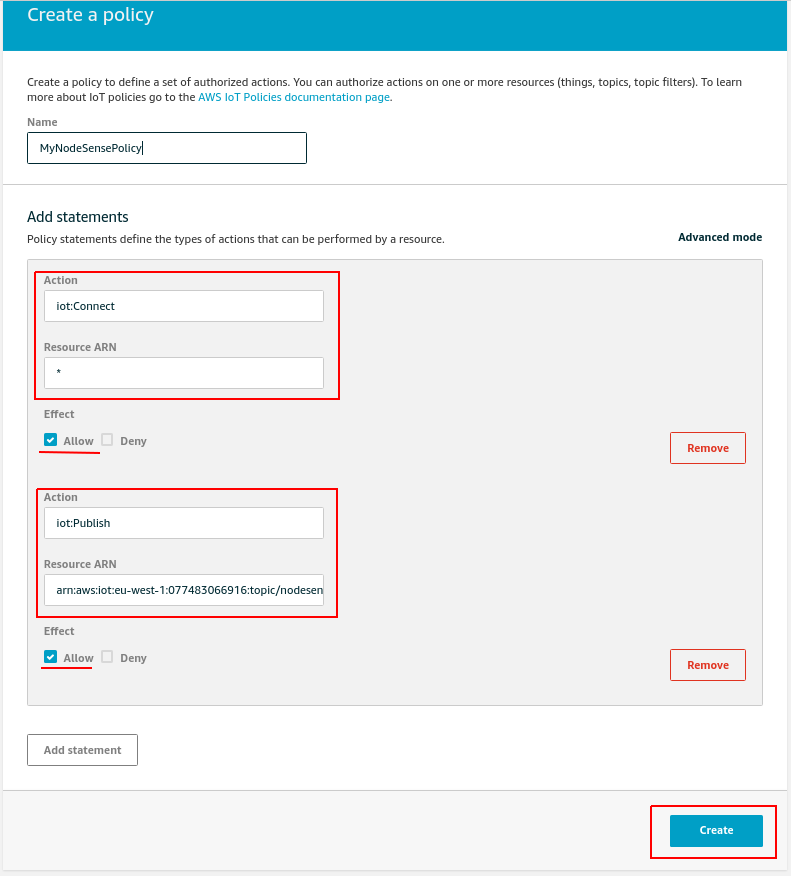
On the Create a policy page, in the Name field, type a name for the policy (for example, MyNodeSensePolicy). In the Action field, type iot:Connect. In the Resource ARN field, type *. Select the Allow checkbox. This allows all clients to connect to AWS IoT.
Now add another rule so that the device can publish data to AWS IoT. In the Action, select 'iot:Publish' and in the Resource field, edit the ARN and change the topic to the /nodesense/<Gateway-ID>/sensors/*/values. You can get the Gateway ID from your NodeSense Gateway. The ARN will be something like this: arn:aws:iot:eu-west-1:012433456789:topic/nodesense/ABCDE1234567/sensors/*/values. Select the Allow checkbox and Create the policy.
In order to use a policy, you must attach it to your device certificate. Attaching an AWS IoT policy to a certificate gives the device the permissions specified in the policy.
In the left navigation pane, choose Secure, and then Certificates.
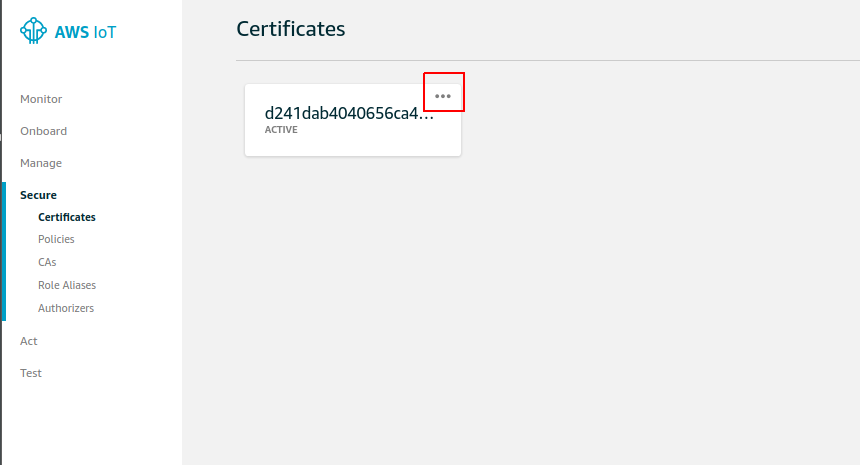
In the box for the certificate you created, choose ... to open a drop-down menu, and then choose Attach policy.

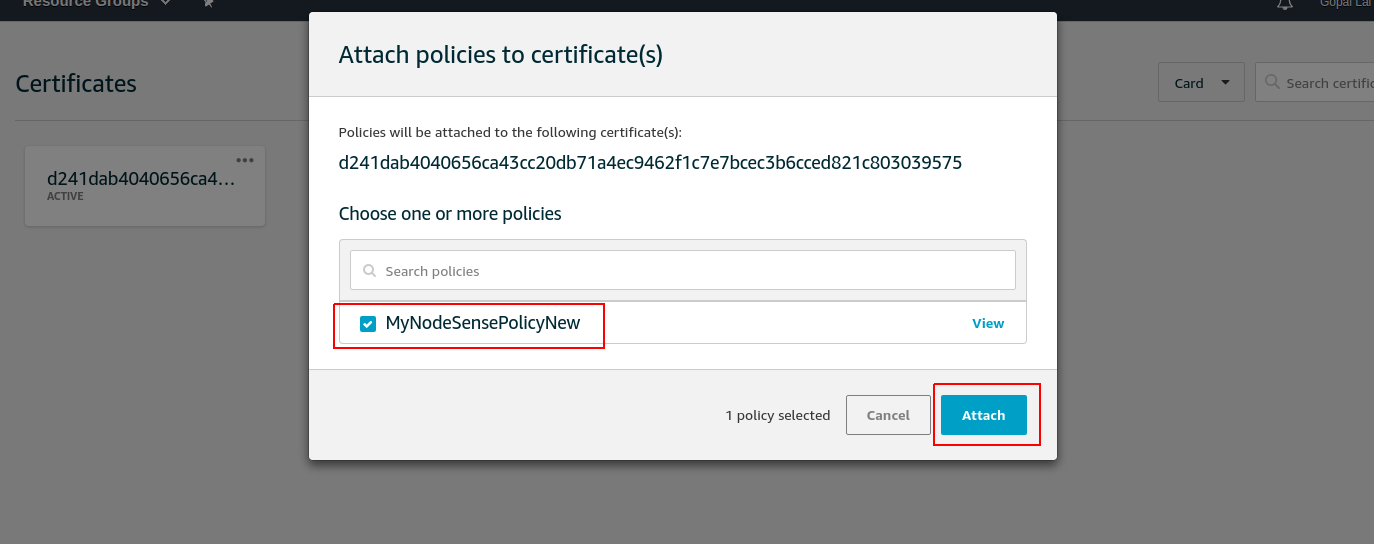
In the Attach policies to certificate(s) dialog box, select the check box next to the policy you created in the previous step, and then choose Attach.
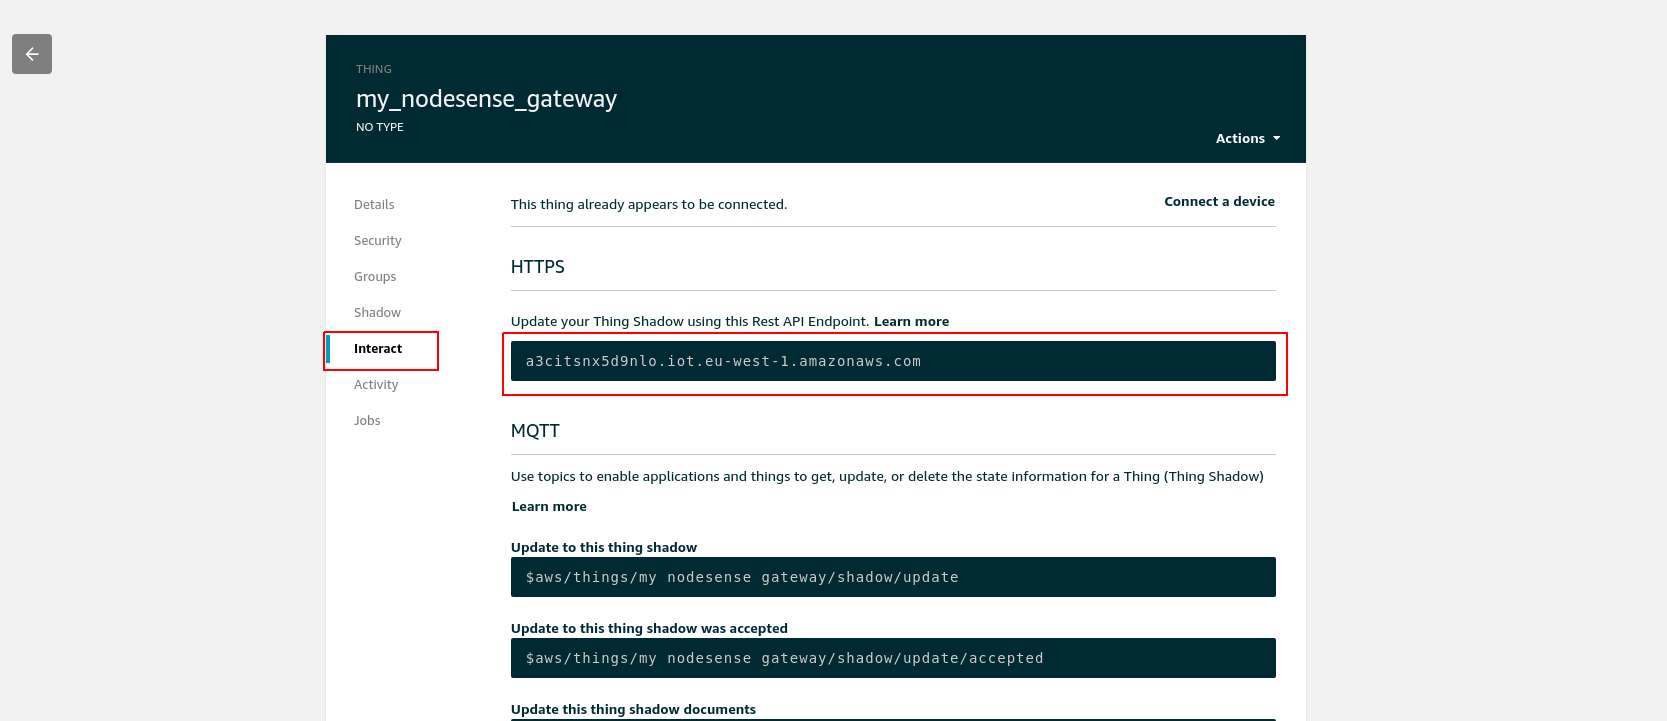
Now we have added the Policy to the certificate and the certificate to the thing, we are ready to configure the NodeSense gateway to send data to the AWS IoT. Before that, we need the endpoint details to the device where we will send data. For that go to the things and click on the thing that we created earlier. On this thing's page go to Interact and copy the device endpoint.
In order to send sensor data to AWS IoT we have to configure the NodeSense gateway with these new details of the thing we created.
First, connect to your NodeSense gateway over WiFi. On the configuration page select AWS IoT as backend. Now for MQTT Server field use the AWS thing's endpoint from the last step. Now select the device certificate and the private key file and click Upload File. Ones the files are uploaded, click on Save & Reboot.
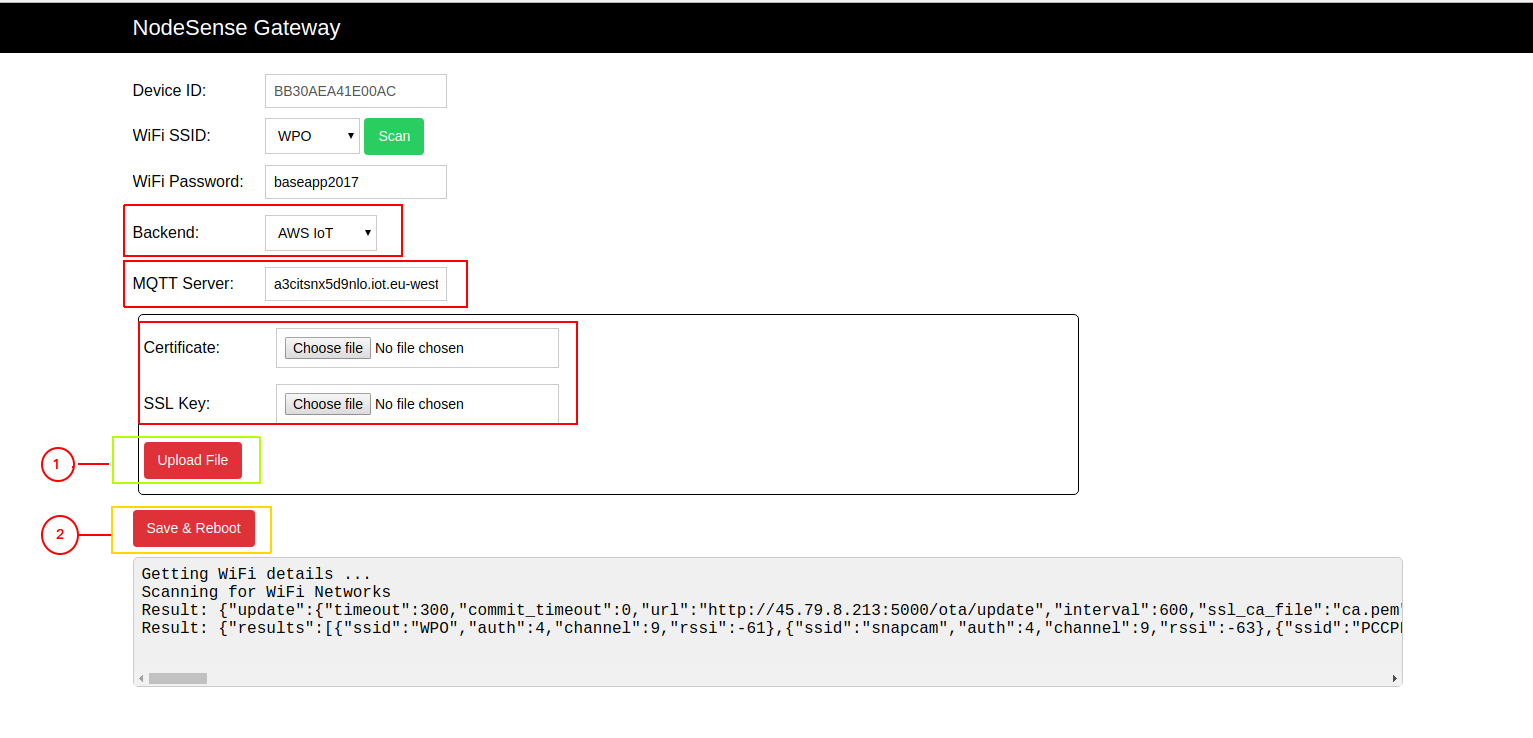
This will save the new configurations and restart the device. From now the device will send all the sensor data to AWS IoT.
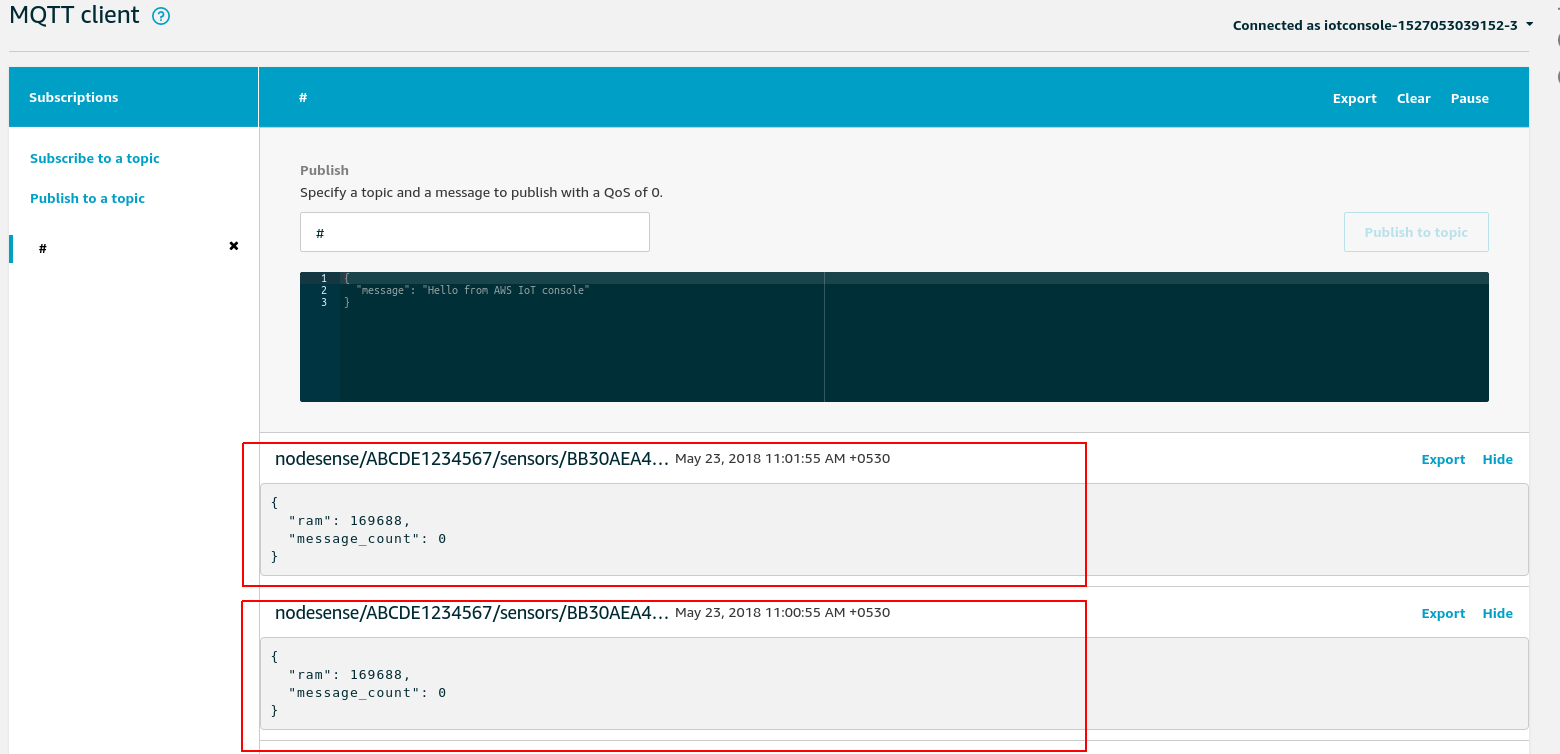
To test the device data goto the AWS IoT page and click Test on left. On this test page subscribe for the topic "#".
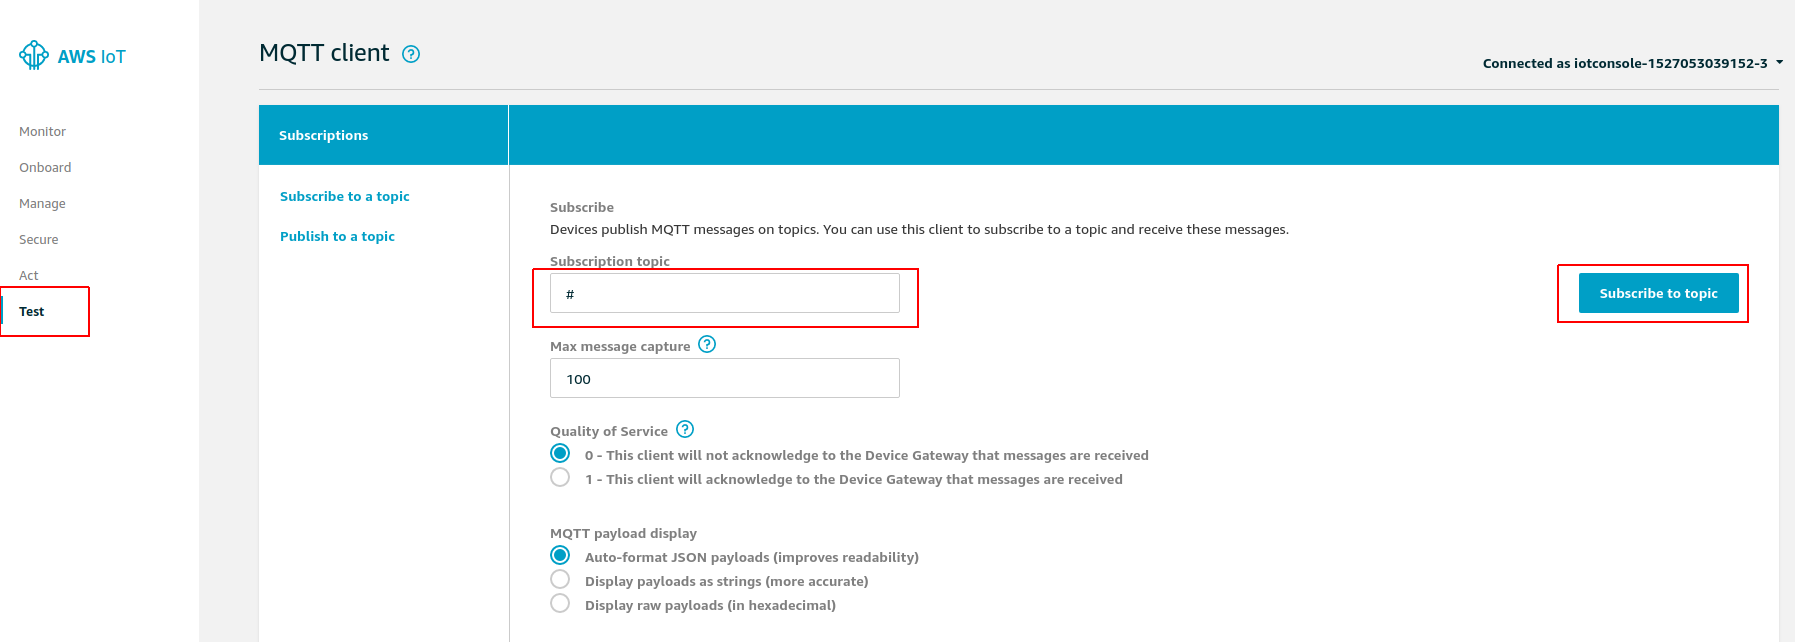
This will subscribe to all data that is sent by the gateway. After subscribe, wait for a movement and you will see the data sent by the gateway.