Getting Started
Installation
SwarmSense setup is really easy. It comes with one-click installer script which will take-care of every dependency of the application.
Follow the installation guide from last topic.
Entities and Relations
Sensor Type
Sensor type is the type of the device for which you want to collect data. While creating a sensor type you can describe the value fields and configurations fields. For example you want to monitor your computer then you can create a sensor type for the computer. Give it a name like ‘Computer’ and your value fields will be like ‘memory’, ‘disk’,’cpu_load’ etc. Sensor Type should have minimum one value field. Now save it and your first sensor type is ready. Now you can create sensors or devices of this type in sensors section and start monitoring your computer uses.
Note: To create a sensor type you will need admin privileges.
Networks
Networks are virtual networks of sensors. You can group multiple sensors into a network. Networks makes it easy to maintain you sensors. You can also attach networks level alerts so you can monitor all the sensor in a network. One sensor can be added to multiple networks.
Company
Company is a key component of SwarmSense data architecture. All the sensors, alerts and networks lies under a company. An user may have many companies and a company may have many sensors. An user can also invite other users to the company.
Sensor
A sensor is a device which is being monitored. While creating a sensor you have to select a sensor type. A sensor belongs to a company and you can attach alerts to a senor. Go through the API documentation for more details about sensors.
Alerts
Alerts are the triggers. You can monitor the sensors with the alert triggers. One sensor can have many alerts and an alerts can be attached with many sensors. SwarmSense will have all the logs of alert triggered.
Create Sensor Type
To create a Sensor Type follow these steps:
-> Login to your account.
-> Go to admin section.
-> Go to Manage Sensor Types and create new Sensor Type.
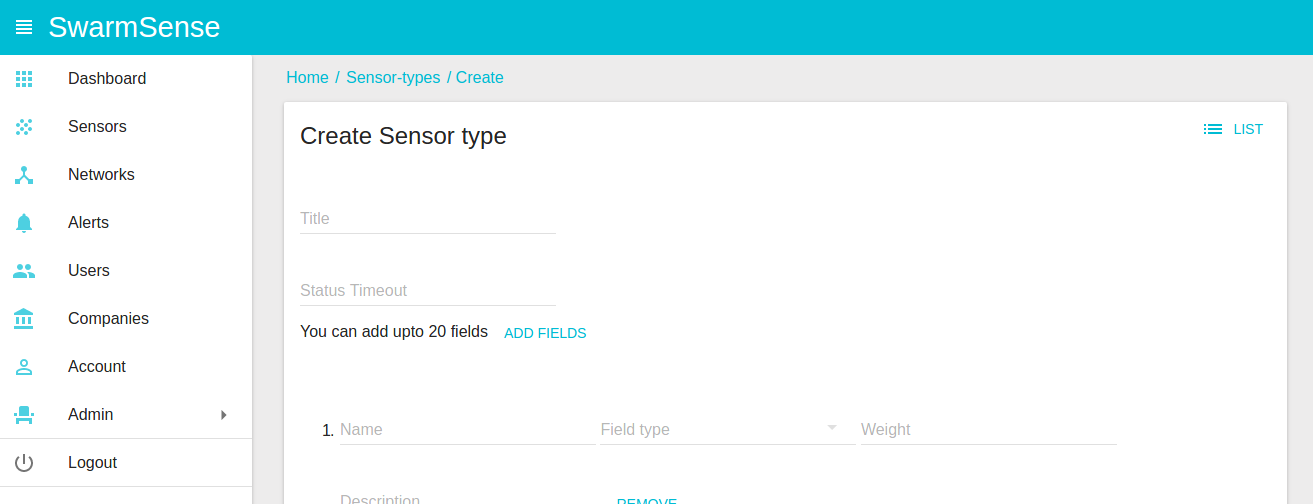
-> Give a name and add value field and configuration field.
-> Save it and done.
Now the Sensor Type is ready, you can add sensors of this type.
Add your first sensor or device
It is really easy to add sensors or devices with the system. Before creating a sensor make sure the sensor type exists. Check how to create sensor type guide for more details. Now
-> Login to your account,
-> Go to sensors section and create sensor,
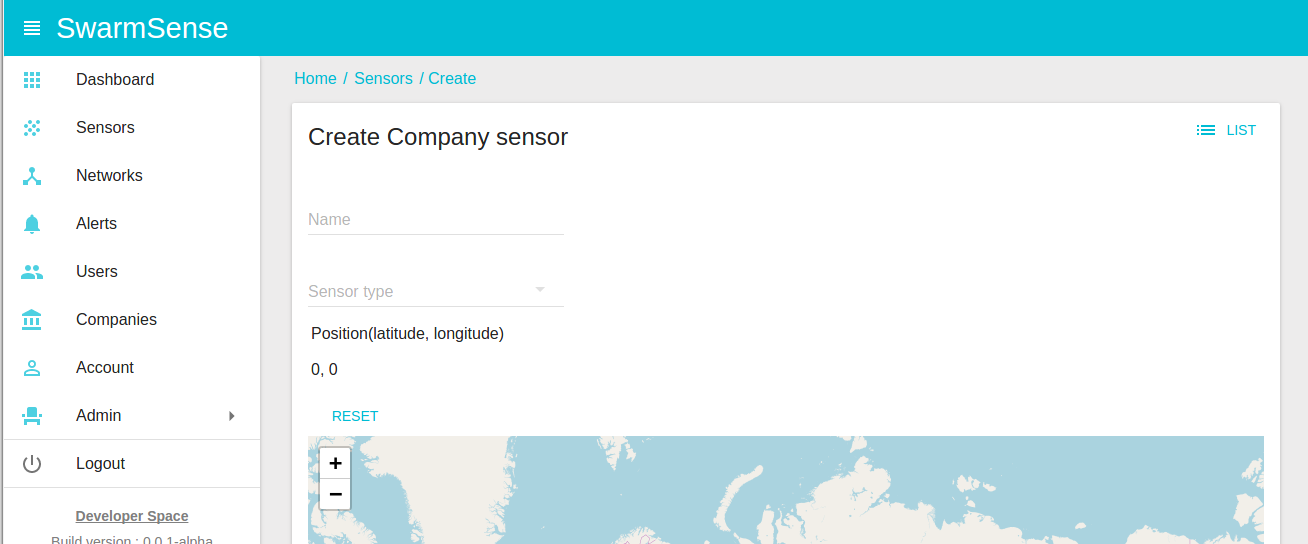
-> Give it a name and select a sensor type,
-> Provide the location if you want,
-> Save it and done!
After saving it will generate a unique id and a access key. These will be needed
while sending data to the sensor.
Send values to the sensor
Post your data to the following endpoint http://<api_end-point>/sensors/<sensor_id>/values.
Normally your <api_end-point> will be <hostname>/api. Send the sensor key in header X-Sensor-key and your data in body. Check the REST api docs
for more details.
For example if your api end-point is is 127.0.0.1/api then here is a python example to
send sensor values.
Shell cURL Example:
curl --request POST \
--url http://127.0.0.1/api/sensors/<sensor_id>/values \
--header 'accept: application/json' \
--header 'cache-control: no-cache' \
--header 'content-type: application/json' \
--header 'x-sensor-key: a1ea4f206acfab65b7b63e4dda608a14' \
--data '{"cpu": 33.3, "temp": 45.0, "memory": 68.4}'
A python example which will read cpu details and then post the values to sensor:
1 2 3 4 5 6 7 8 9 10 11 12 13 14 15 16 17 18 19 20 21 | #!/usr/bin/python3
import requests
import psutil
import json
# Change sensor_id with your sensor id and use key in headers.
url = "http://127.0.0.1/api/sensors/<sensor_id>/values"
mem = psutil.virtual_memory()
temp = psutil.sensors_temperatures()
payload = {
"memory": mem.percent,
"cpu": psutil.cpu_percent(interval=1),
"temp": temp['k10temp'][0].current
}
print(payload)
headers = {
'x-sensor-key': "a1ea4f206acfab65b7b63e4dda608a14",
'content-type': "application/json",
}
response = requests.request("POST", url, data=json.dumps(payload), headers=headers)
print(response.text)
|
Observer sensor data on Web UI
Once you posted data the sensor data, it will be available on the Web UI on sensors page.
Go to the sensors page you will see the latest data here.
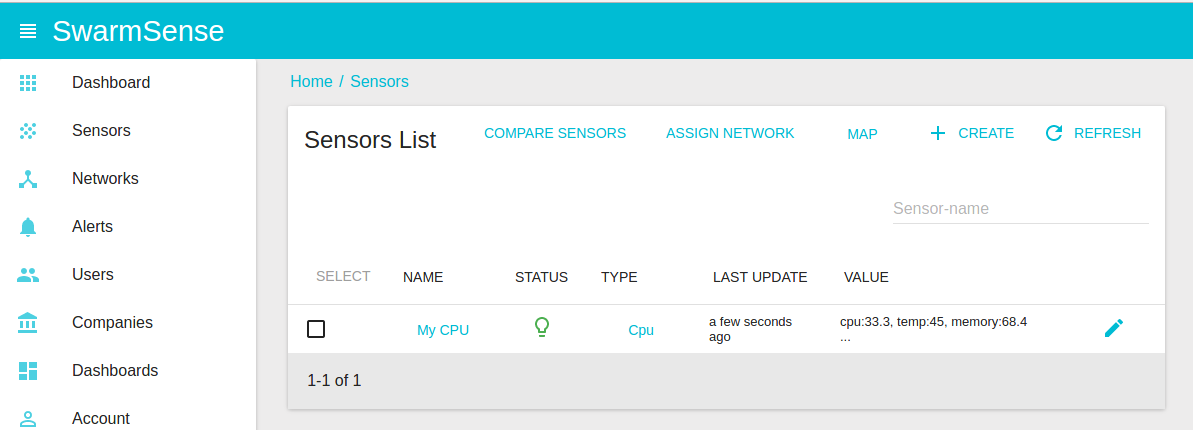
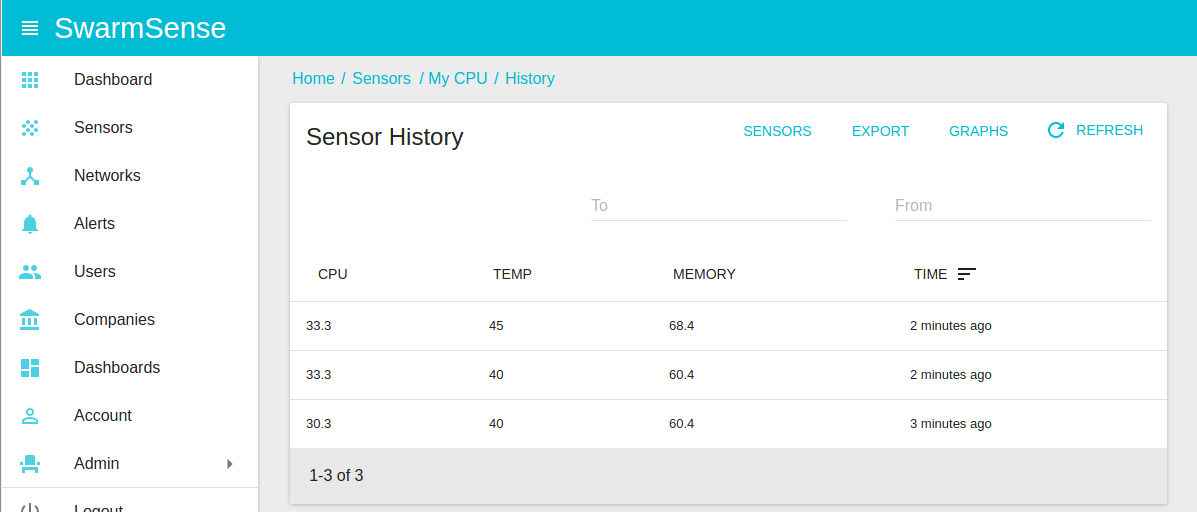
You can see the sensor data history and graphs by clicking on sensor name.
Create alerts
Alerts or triggers are a key part of any monitoring system and Swarmsense IoT platform makes it really easy. To create a new alert
- Go to alerts section,
- Create a new alert
- Give it a name and select a type
- Select the sensor type and a field which you want to monitor
- Add email and time duration
- Save and you are done.
Publish Sensor Data with MQTT
MQTT is one of the most used communication protocol in IoT devices. With Swarmsense IoT platform it really easy to use it. let’s do it.
First of all create a sensor. Follow the above guide to create a sensor. Please notedown
the senosr id and key. It will be used to authenticate and send values. By default
your MQTT port is 1883 and host is your server name. To authenticate with server, username
will be sensor_<sensor_id> and password will be the sensor key. To send the data,
publish json encoded string in body on sensors/<sensor_id>/values topic.
Hear is a simple example in python to publish sensor data with MQTT. It will publish
every minute. Here we are using paho mqtt client.
1 2 3 4 5 6 7 8 9 10 11 12 13 14 15 16 17 18 19 20 21 22 23 24 25 26 27 28 29 30 31 32 33 34 35 36 37 38 39 40 41 42 43 | #!/usr/bin/python3
import psutil
import json
from paho.mqtt.client import Client
import time
mqttc = Client()
# Change HOST with your hostname
HOST = 'localhost'
# Use your sensor id. Here it is 1a43s13sz
USERNAME = 'sensor_1a43s13sz'
# Sensor key as password
PASSWORD = 'a1ea4f206acfab65b7b63e4dda608a14'
if USERNAME:
mqttc.username_pw_set(USERNAME, PASSWORD)
mqttc.connect(HOST, 1883)
mqttc.loop_start()
while True:
try:
mem = psutil.virtual_memory()
temp = psutil.sensors_temperatures()
payload = {
"memory": mem.percent,
"cpu": psutil.cpu_percent(interval=0),
"temp": temp['k10temp'][0].current
}
rc, mid = mqttc.publish('sensors/1a43s13sz/values', json.dumps(payload), qos=0, retain=False)
if rc != 0:
print(rc)
time.sleep(60)
except KeyboardInterrupt:
break
mqttc.loop_stop()
mqttc.disconnect()
|
What Next?
Explore more features of SwarmSense IoT:
- Create Dashboards
- Add alerts
- Manage sensor networks
- Add other users to your company
See also
- Checkout Server Monitoring System with SwarmSense
- A tutorial to monitor server metrics with SwarmSense IoT platform.